Tech · · 3 min read · Part 3 of 3
Ansible Dev Server using Code Server
A browser-based VS Code environment for Ansible development, reachable from any device
code-server is an open-source project from Coder that runs Visual Studio Code on a remote server and serves it to your browser. Put the Ansible tools on that server, and you have a fully configured Ansible development environment on any device with a browser: a laptop, a borrowed machine, even a tablet.
Why use code-server for Ansible development
- Work anywhere: open a browser and log in.
- Consistent environment: every developer works in the same set-up.
- Minimal local requirements: nothing to install on the device you’re using.
- Central management: update and secure it in one place.
How it fits together
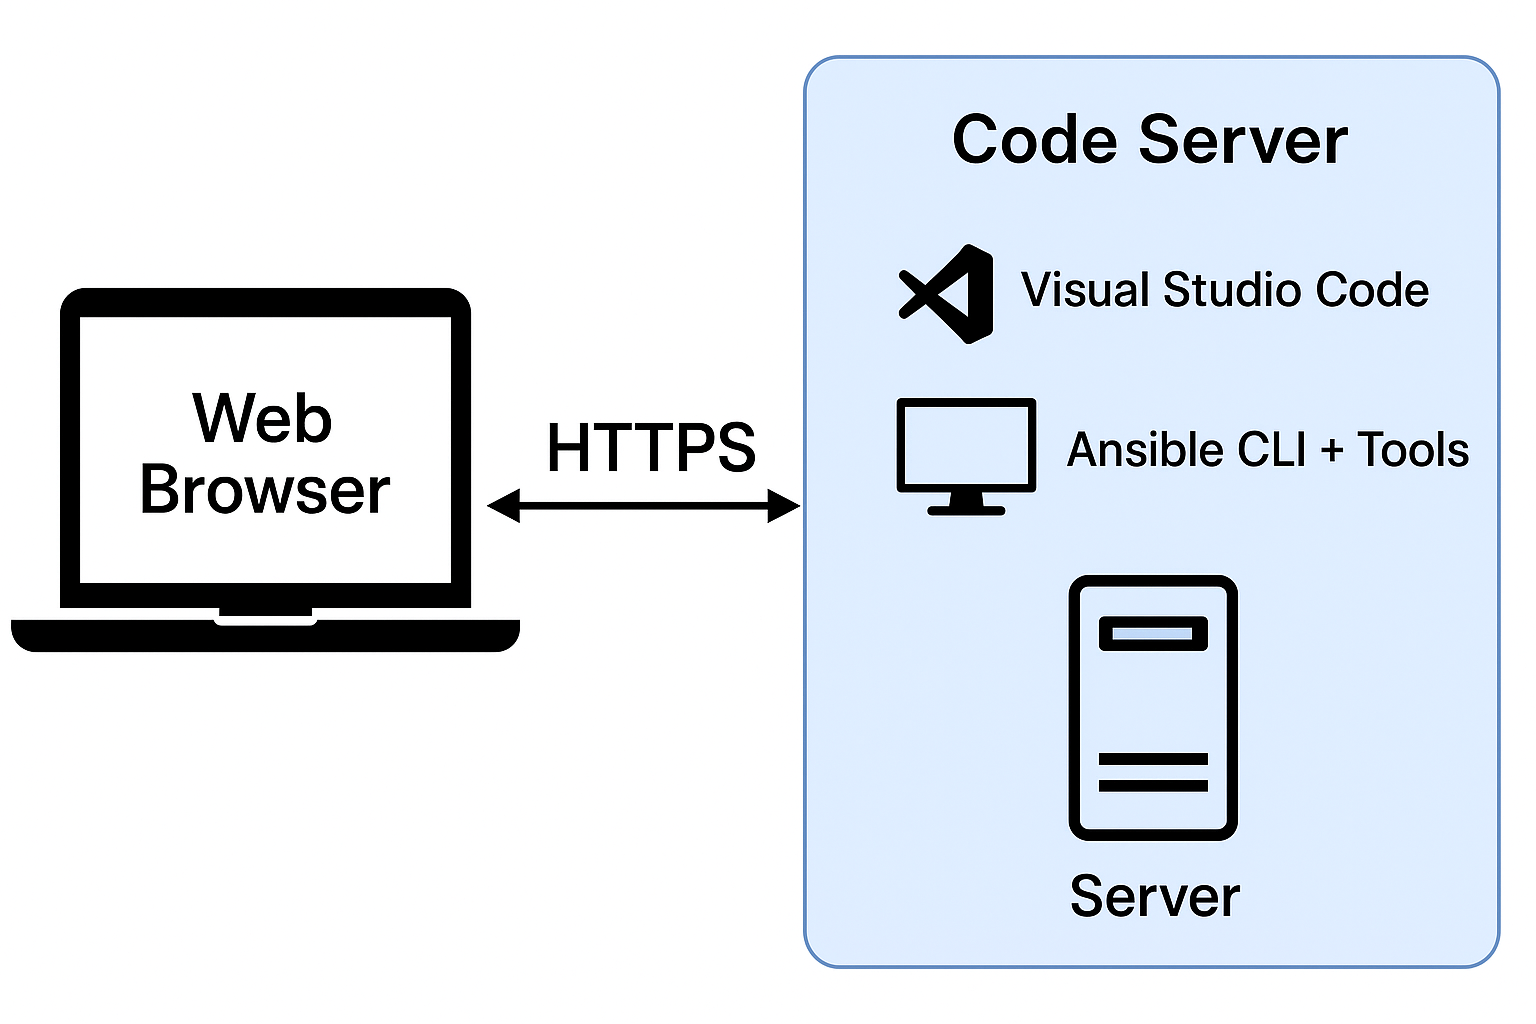
- A remote server (a VM, or an EC2 instance on AWS) runs code-server.
- The Ansible Development Tools are installed on that server.
- You reach it from a browser, with password authentication, over an encrypted connection.
Prerequisites
- A Linux server or cloud instance, such as an AWS EC2 instance or an on-premises VM.
- SSH access to it.
- Python 3, for the Ansible tools.
- Optional: Podman or Docker, if you want to run execution environments.
- Optional: a domain name, if you want to reach it over HTTPS without an SSH tunnel.
Install code-server
-
Download and install code-server:
curl -fsSL https://code-server.dev/install.sh | sh -
Set the password. Edit
~/.config/code-server/config.yaml:bind-addr: 127.0.0.1:8080 auth: password password: choose-a-long-random-password cert: false127.0.0.1is code-server’s default, and the safe one: it listens only on the server itself, and you reach it through a tunnel or a reverse proxy (next section). -
Start code-server:
code-server
To keep it running after you log out, run it as a service. The code-server documentation shows the systemd set-up.
-
Install the Ansible tools in a virtual environment, and the Ansible extension:
python3 -m venv ~/ansible-venv
~/ansible-venv/bin/pip install ansible-dev-tools
code-server --install-extension redhat.ansible
code-server --list-extensions
A virtual environment keeps the tools apart from the system’s Python; recent Ubuntu and Debian releases refuse a system-wide
pip install. In code-server, point the Ansible extension’s Python interpreter setting at~/ansible-venv/bin/pythonso it finds them.code-server installs extensions from Open VSX, not from Microsoft’s VS Code Marketplace, which only allows Microsoft’s own products. Most popular extensions, including Red Hat’s Ansible extension, are published there; a few Microsoft extensions are not.
Reach it from your browser
The simplest secure way: an SSH tunnel. From your laptop:
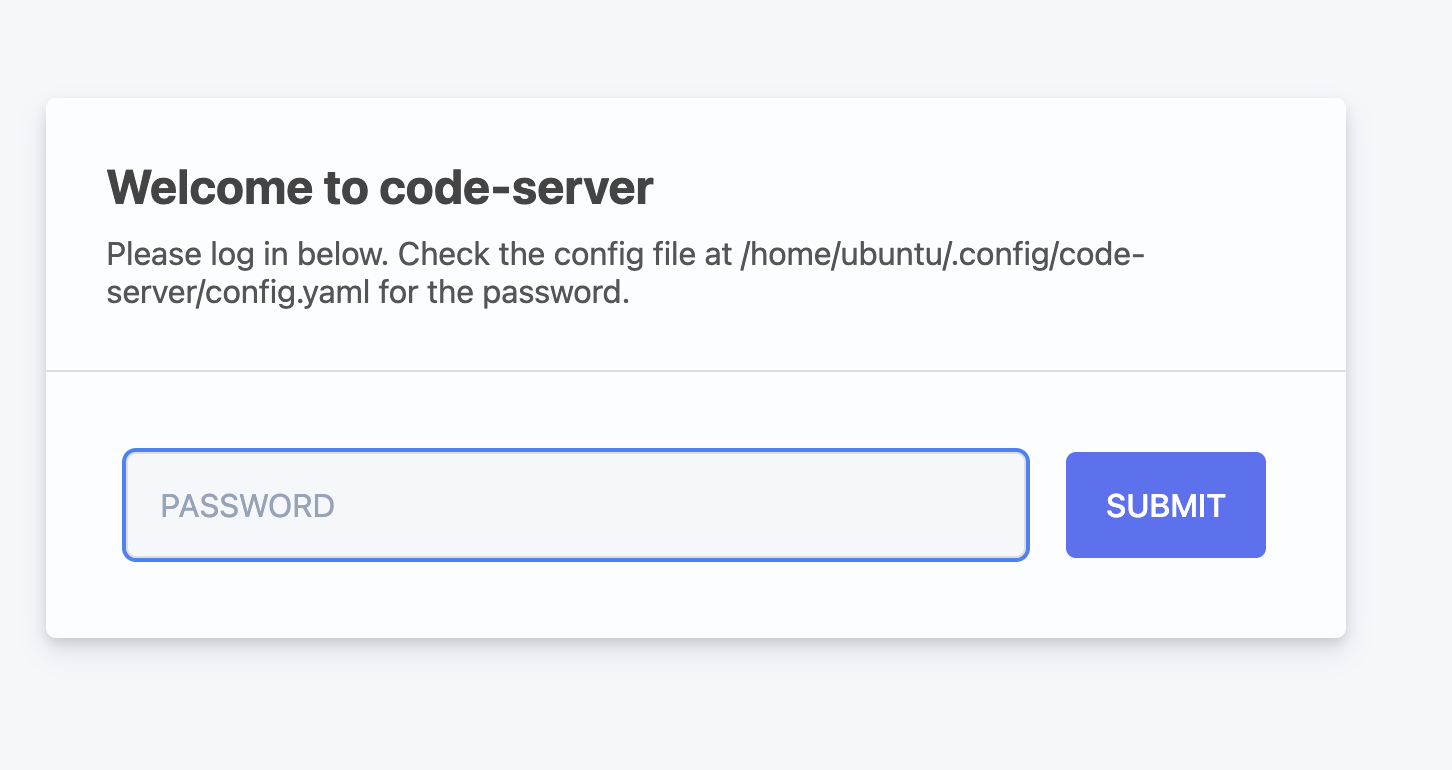
ssh -N -L 8080:127.0.0.1:8080 user@your-serverThen browse to http://localhost:8080 and log in with the password from the config file. The traffic travels inside
SSH, and nothing new is exposed on the server.
From any device, without SSH: HTTPS through a reverse proxy. Point a domain at the server, keep code-server on
127.0.0.1:8080, and put Caddy or NGINX with Let’s Encrypt in front of it.
That gives you a real certificate, which code-server needs for some features to work.
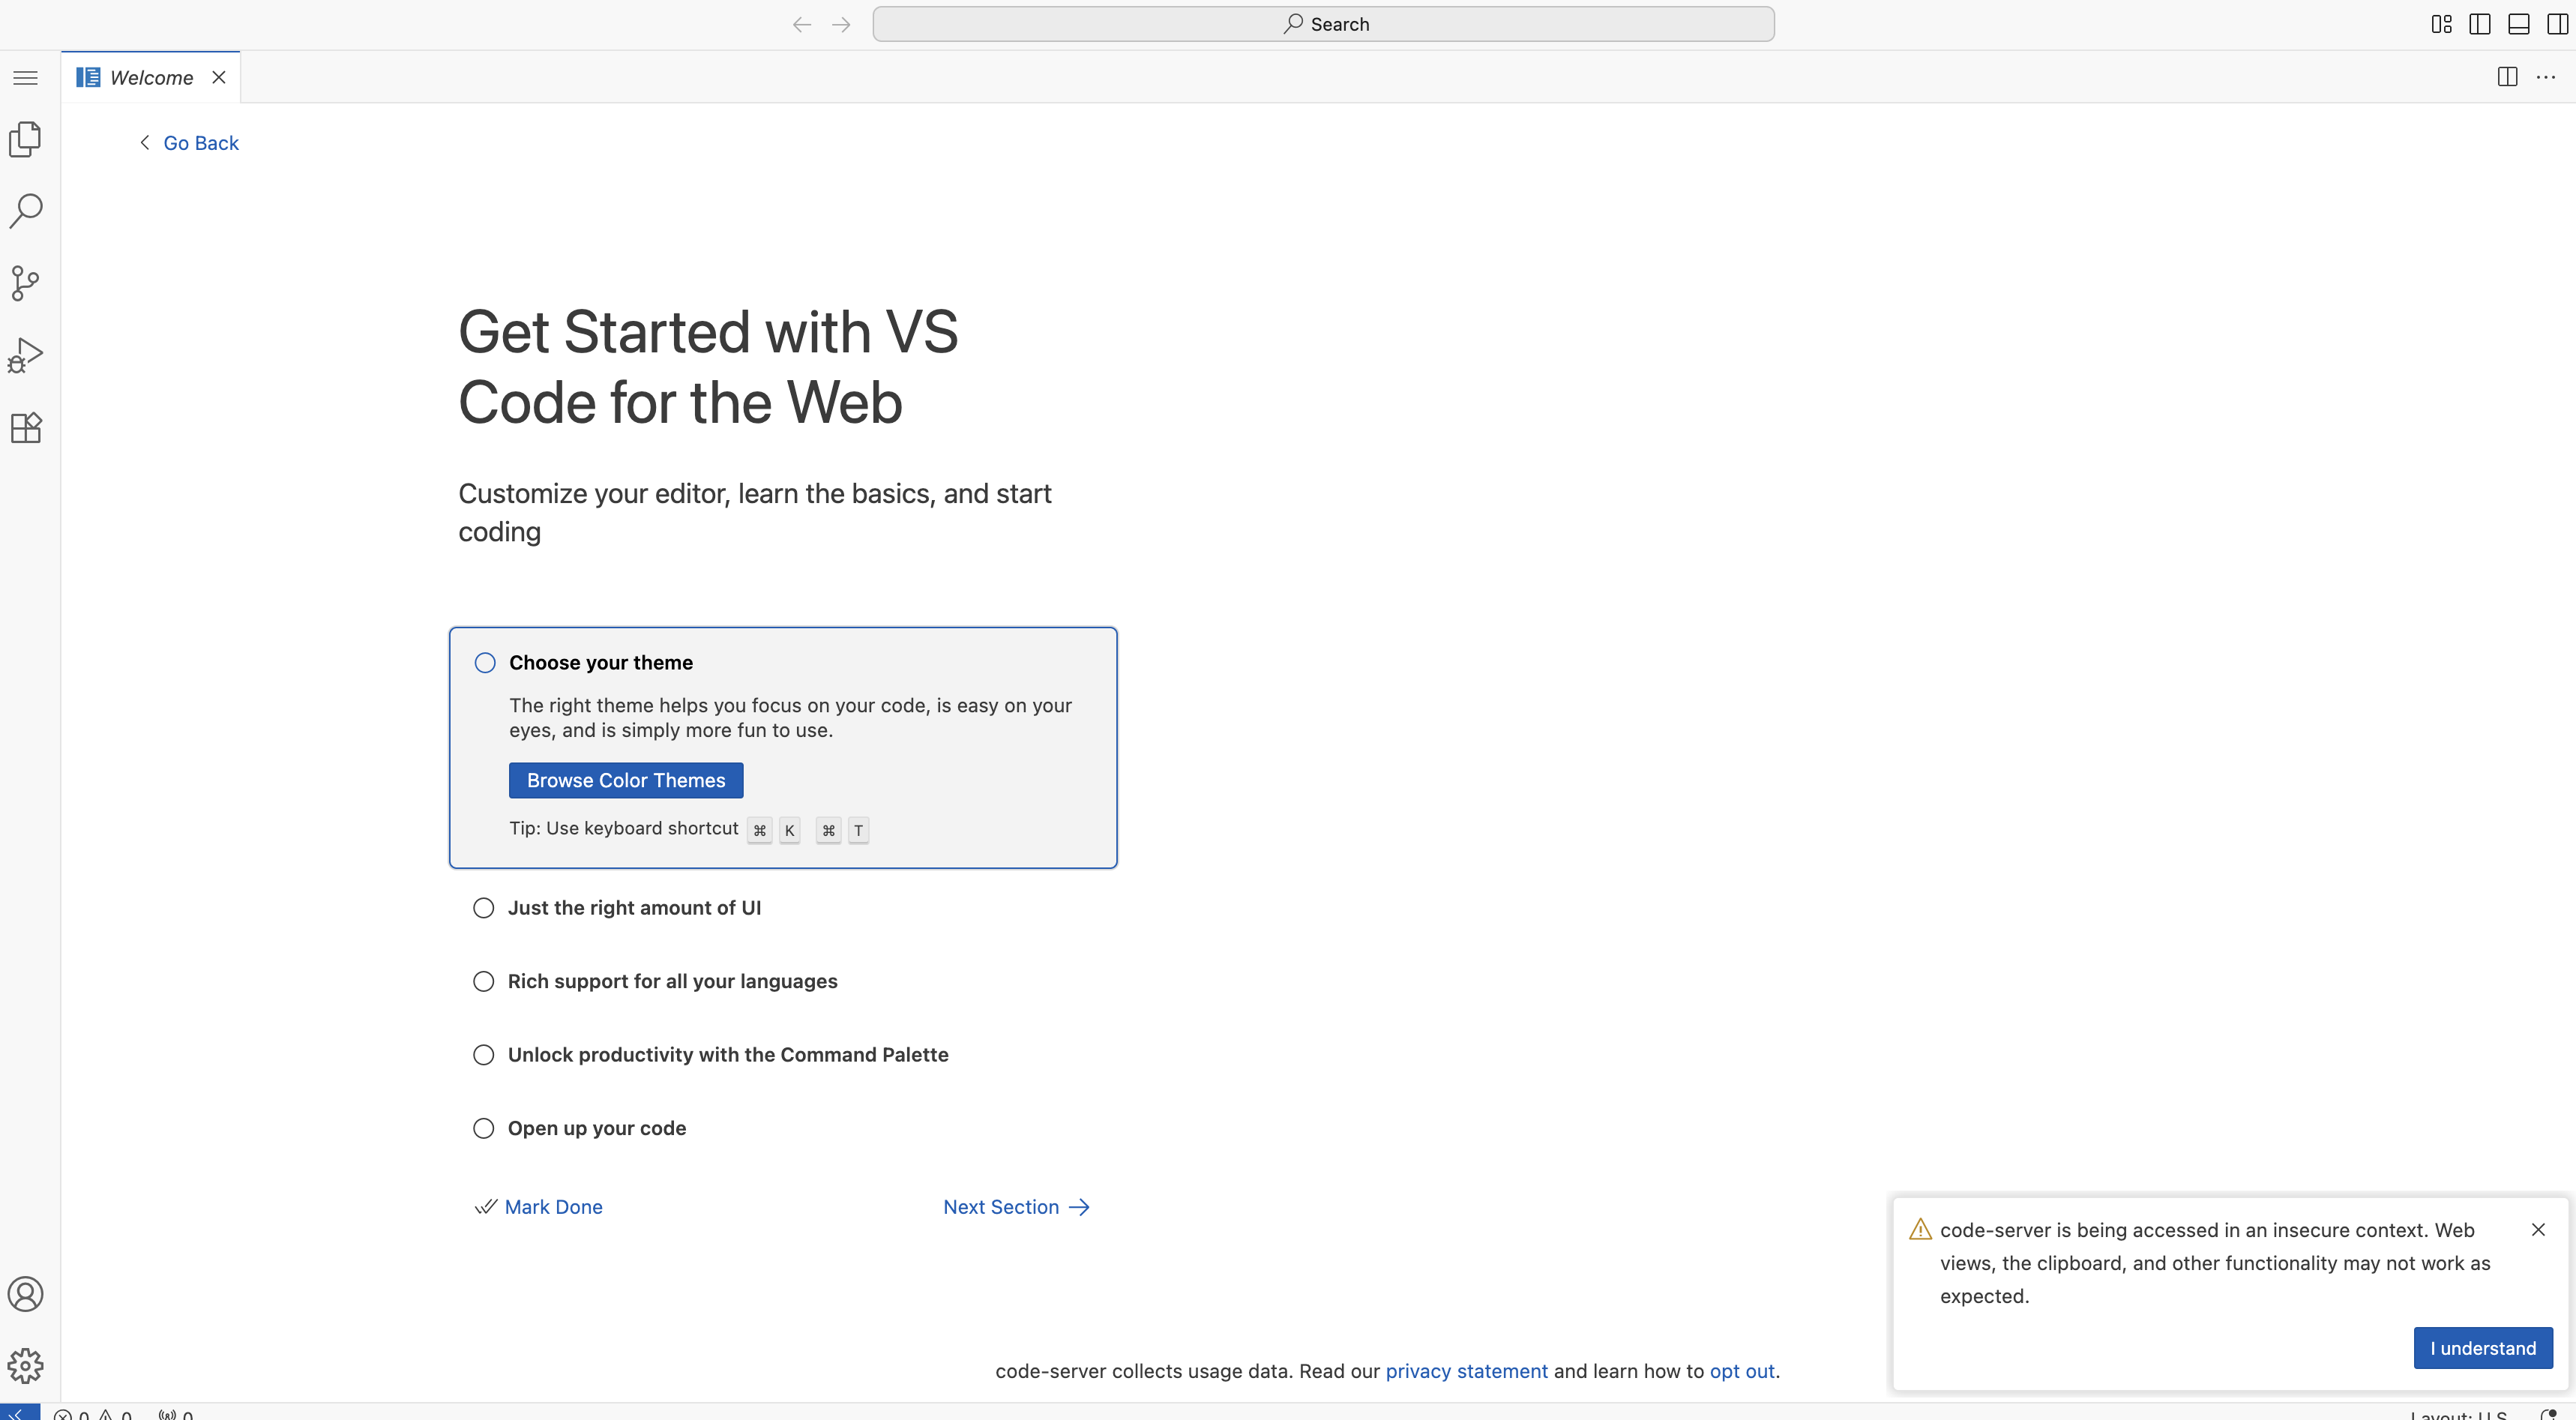
Without HTTPS, code-server warns that it is “being accessed in an insecure context”, and web views and the clipboard may not work:
Keep it safe
- Don’t expose plain HTTP to the internet. If you must bind to
0.0.0.0for a quick test, restrict the port in your firewall or AWS security group to your own IP address, and undo it afterwards. - Use a long random password, and don’t commit
config.yamlanywhere. - Keep code-server updated. Run the install script again to upgrade.
Wrapping up
code-server gives you a portable, consistent Ansible workspace that follows you to any browser, with the server doing the heavy lifting. Start with the SSH tunnel; add HTTPS when you need to reach it from devices without SSH.
Note I used AI assistance to draft or edit this post, working from my own notes and experience, and I reviewed every change. The opinions and any mistakes are mine.